If you store, move, or sell your products in batches, you know how important it is to track those batches accurately. The NetSuite Lot Tracking feature helps you do just that, making it easy to trace, manage, and report on groups of inventory items by lot number. In this blog, we’ll walk through what lot tracking is, how to enable it in NetSuite, and how you can use it effectively in your business.
What Is NetSuite Lot Tracking?
NetSuite lot tracking allows you to assign a lot number to a group of inventory items that share common characteristics, such as production date, expiration date, or origin. Each lot number can be used to:
- Track which batch of items was sold to which customer
- Monitor expiration dates or recalls
- Ensure compliance with regulatory or quality standards
Unlike serialized inventory (which tracks items one by one), lot tracking manages groups, which is ideal for products that are identical within a batch. Lot tracking is often used for products like food, supplements, chemicals, and cosmetics.
Enabling Lot Tracking in NetSuite
Before you can start using lot tracking, you’ll need to enable two features: Inventory and Lot Numbered Inventory. You’ll find both features under the Items & Inventory section of Enable Features. Once enabled, you’ll be able to create lot-numbered inventory items and start tracking batches of inventory.
Creating a Lot Numbered Inventory Item
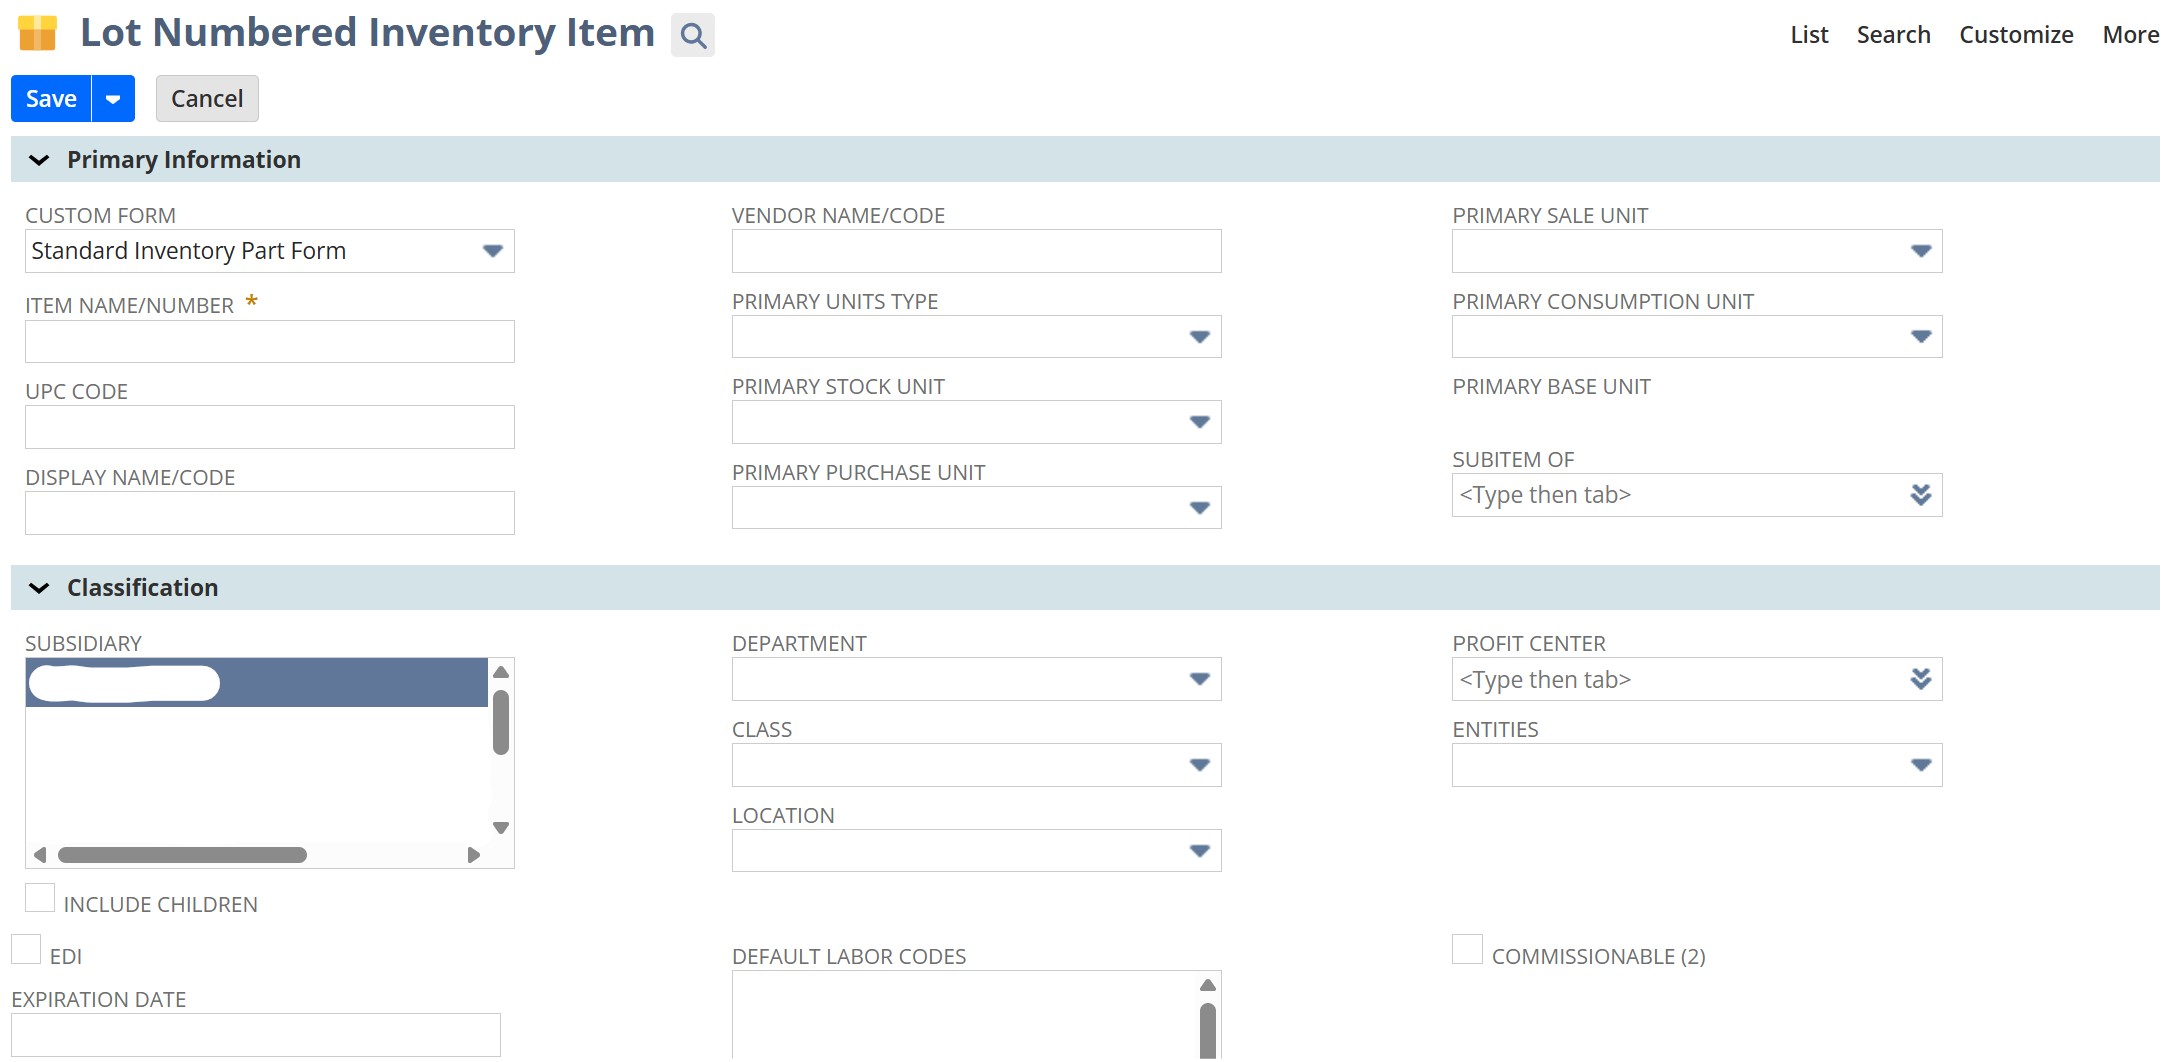
Creating a lot numbered inventory item will look similar to creating both regular and serialized items. To start, navigate to Lists > Accounting > Items > New. From the list, choose the Lot Numbered link under the Inventory item type.

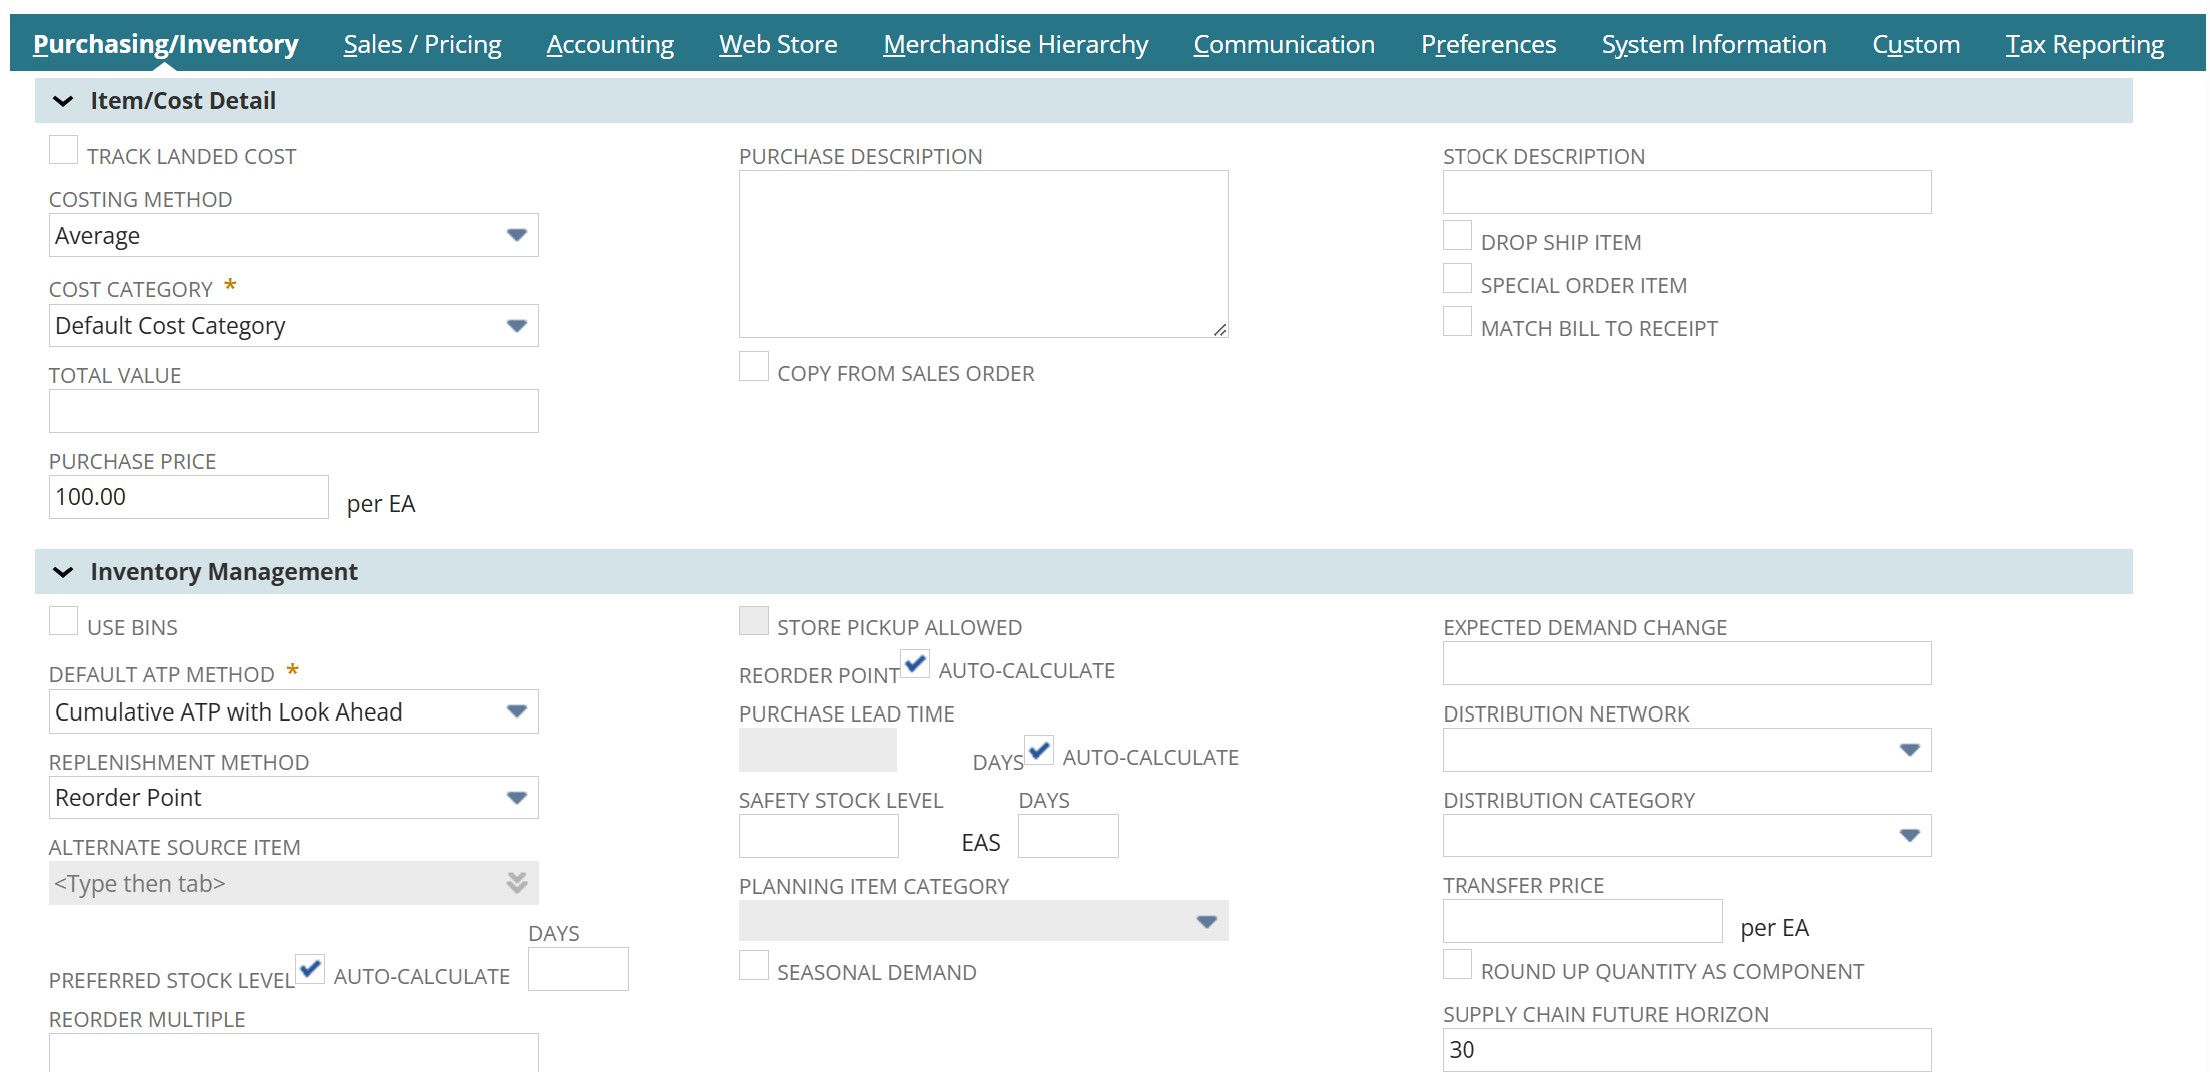
On the new Lot Numbered Inventory Item record, fill out the standard item fields like name, vendor name, units type, and classification details such as subsidiary, department, class, and location. Then, scroll down to the Purchasing/Inventory subtab.

Here, you can set the purchase price per unit of this item. You can also set the preferred location for this item. When you’re finished adjusting your preferences, save the record.
Managing Lot Numbers in Transactions
Setting Lot Numbers on Purchase Orders
One way you can set lot numbers for a batch of items is directly on purchase orders. To do that, navigate to Transactions > Purchases > Enter Purchase Orders. On this page, select the relevant vendor. Then, scroll down to the Items tab and select the Items subtab.

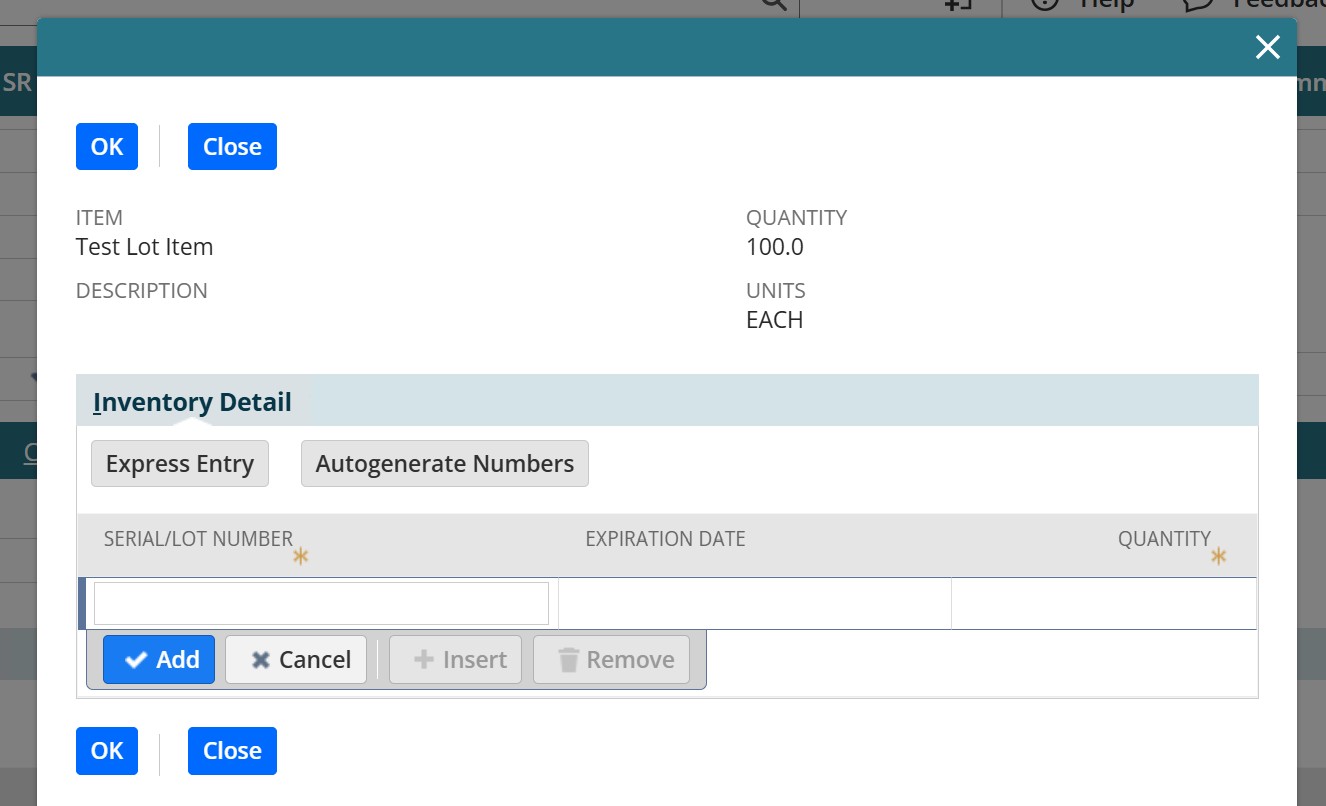
In the list, select the lot numbered item you just created and set the quantity. Then, select the box icon in the Inventory Detail column. This will open a pop up window where you can set the lot numbers for these items.

You can either create one lot number for the entire order quantity, or you can split the quantity over multiple lot numbers. To create a lot number, either do so manually under the Serial/Lot Number column or use the Autogenerate Numbers button. When you’re finished, hit “ok” to return to the purchase order record. Review your selections and save the record.
Receiving Lot Numbered Inventory
To receive lot numbered inventory, navigate to Transactions > Purchases > Receive Orders and select “Receive” next to the desired order. This will take you to the item receipt record. Scroll down to the Items & Expenses tab, and make sure you are receiving the correct quantity. If necessary, you can do a partial receipt on the quantity that was listed on the purchase order. You can also go into the Inventory Detail pop up and select exact quantities for specific lot numbers (if you created multiple lot numbers on the purchase order).

What if you didn’t set lot numbers on the purchase order? In that case, you would create the lot numbers on the item receipt record using the Inventory Detail pop up window, just as you would on the purchase order. When you’re finished, save the item receipt record.
Using Lot Numbered Inventory
Now that you have lot numbered items in your inventory, how do you use them? Once a lot number is assigned to an item, it follows that item through sales orders and fulfillments, transfers between locations, and returns and adjustments. This ensures complete traceability for quality control, audits, and customer service. On any transaction, when you select a lot numbered item NetSuite will assume you’re adding a single item unless you specify a higher quantity.
Lot Tracking vs. Serialized Inventory
In a previous blog, we explored how to set up and use serialized inventory in NetSuite. What’s the difference between lot numbered items and serialized items? How do you know which item type works best for you? Here’s a quick breakdown of those key differences:
Serialized Inventory
- Tracks individual units
- Used for high-value items
- Best for electronics, medical devices, and high-value tools
Lot Numbered Inventory
- Tracks groups of items rather than individual units
- Sometimes used for high-value items
- Best for food, chemicals, and bulk materials
As a general rule, if you need to manage inventory in groups rather than unit by unit, lot tracking is the way to go.
We’re Here to Help You Track It All
Implementing lot tracking in NetSuite can feel like a big step, but it doesn’t have to be complicated. At SuiteRep, we’re equipped to help you configure inventory features in a way that makes the most sense for your team, your products, and your workflows. Reach out to us to start the conversation! We’d love to help you start seeing better business results with NetSuite.
