NetSuite Serialized Inventory

NetSuite for Distributors

Some industries, like electronics, medical devices, or high-value equipment, require precision and accountability. Accurately tracking inventory for these types of products is essential. The NetSuite Serialized Inventory feature allows you to track individual units of inventory using serial numbers, giving you the full traceability you need from receipt through sale. In this blog, we’ll walk through what serialized inventory is, how to enable it in NetSuite, and how to use it effectively in your operations.

What Is Serialized Inventory?

The NetSuite Serialized Inventory feature assigns a unique serial number to each unit of an item. That means you can track:
  • Which specific unit was sold to which customer
  • When and where an item was received or shipped
  • Serial-specific details like warranty, repairs, or recalls
This level of detail is especially valuable for compliance, product recalls, or service-related follow-ups.

Setting Up Serialized Inventory

Enable Serialized Inventory in NetSuite

To get started, you’ll first need to enable two features in your account:
  1. Inventory: Located on the Items & Inventory subtab of Enable Features
  2. Serialized Inventory: Also under Items & Inventory, this adds the serial tracking functionality to your inventory items.
Once these features are enabled, you’ll be able to create inventory items that use serial tracking.

Create a Serialized Inventory Item Record
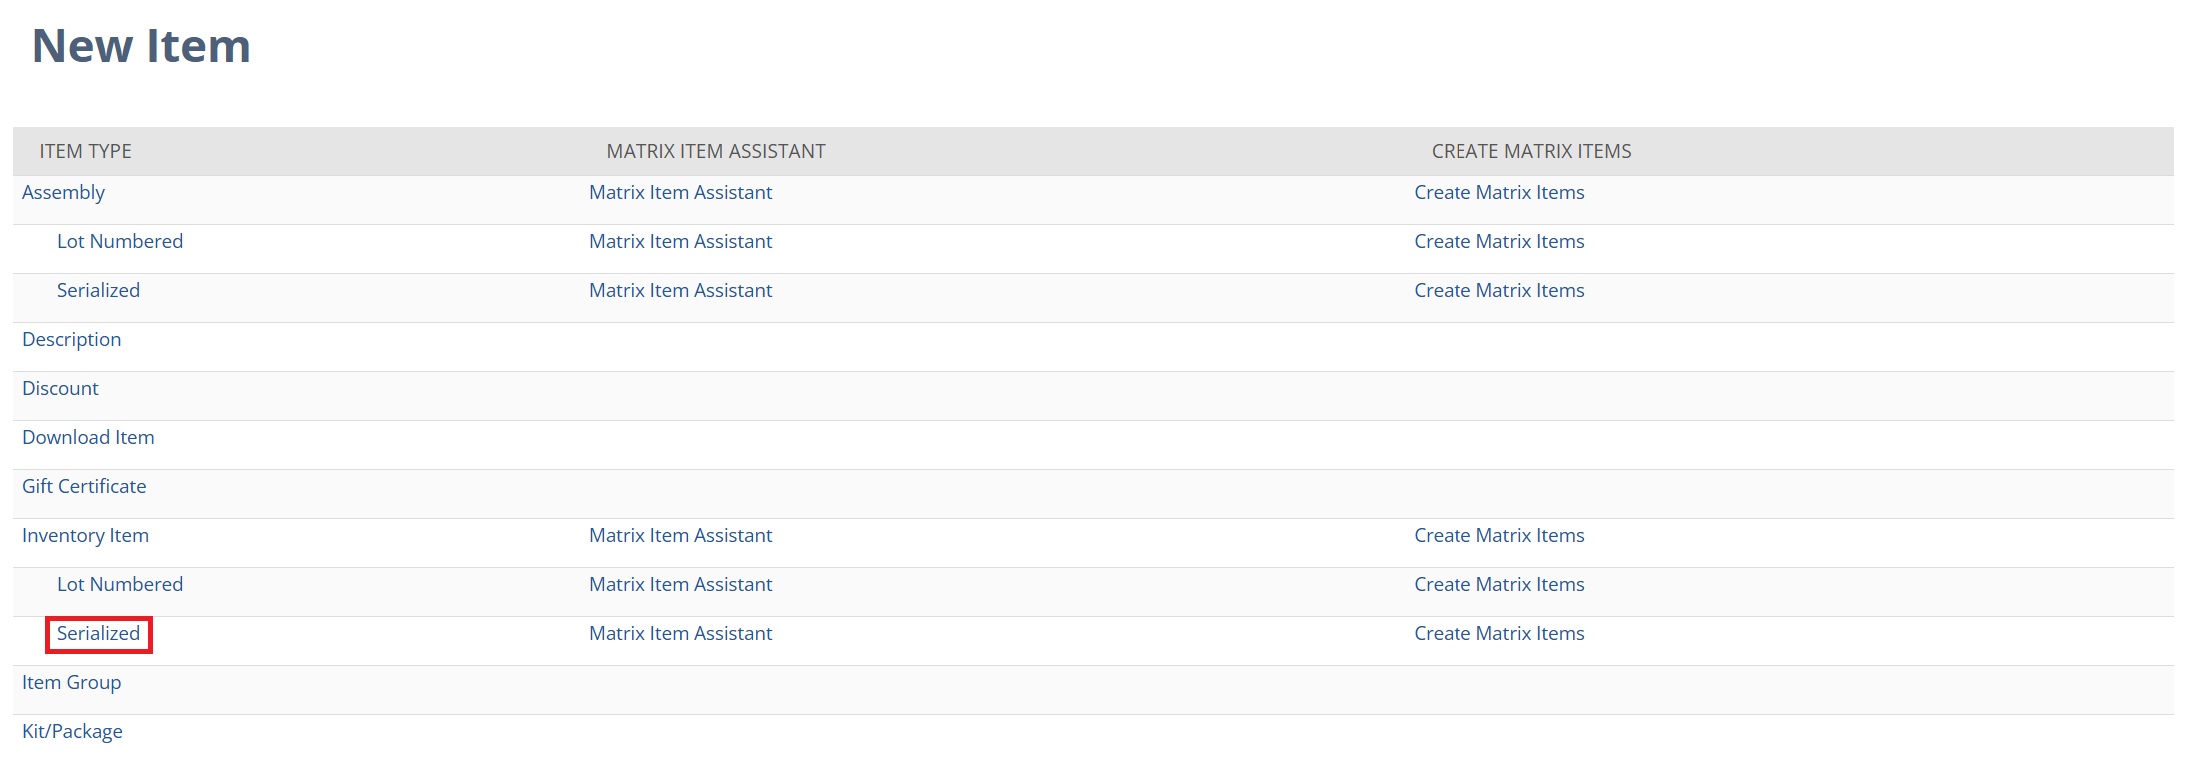
To create a serialized inventory item, navigate to Lists > Accounting > Items > New. Locate the Inventory Item from the list of item types and select the Serialized option beneath it.
Create New NetSuite Serialized Items

On the new item record, fill in the basic item details, including the item name; the stock, purchase, and sale unit for the item; the relevant vendor name; and any relevant classification details for subsidiary, department, etc.
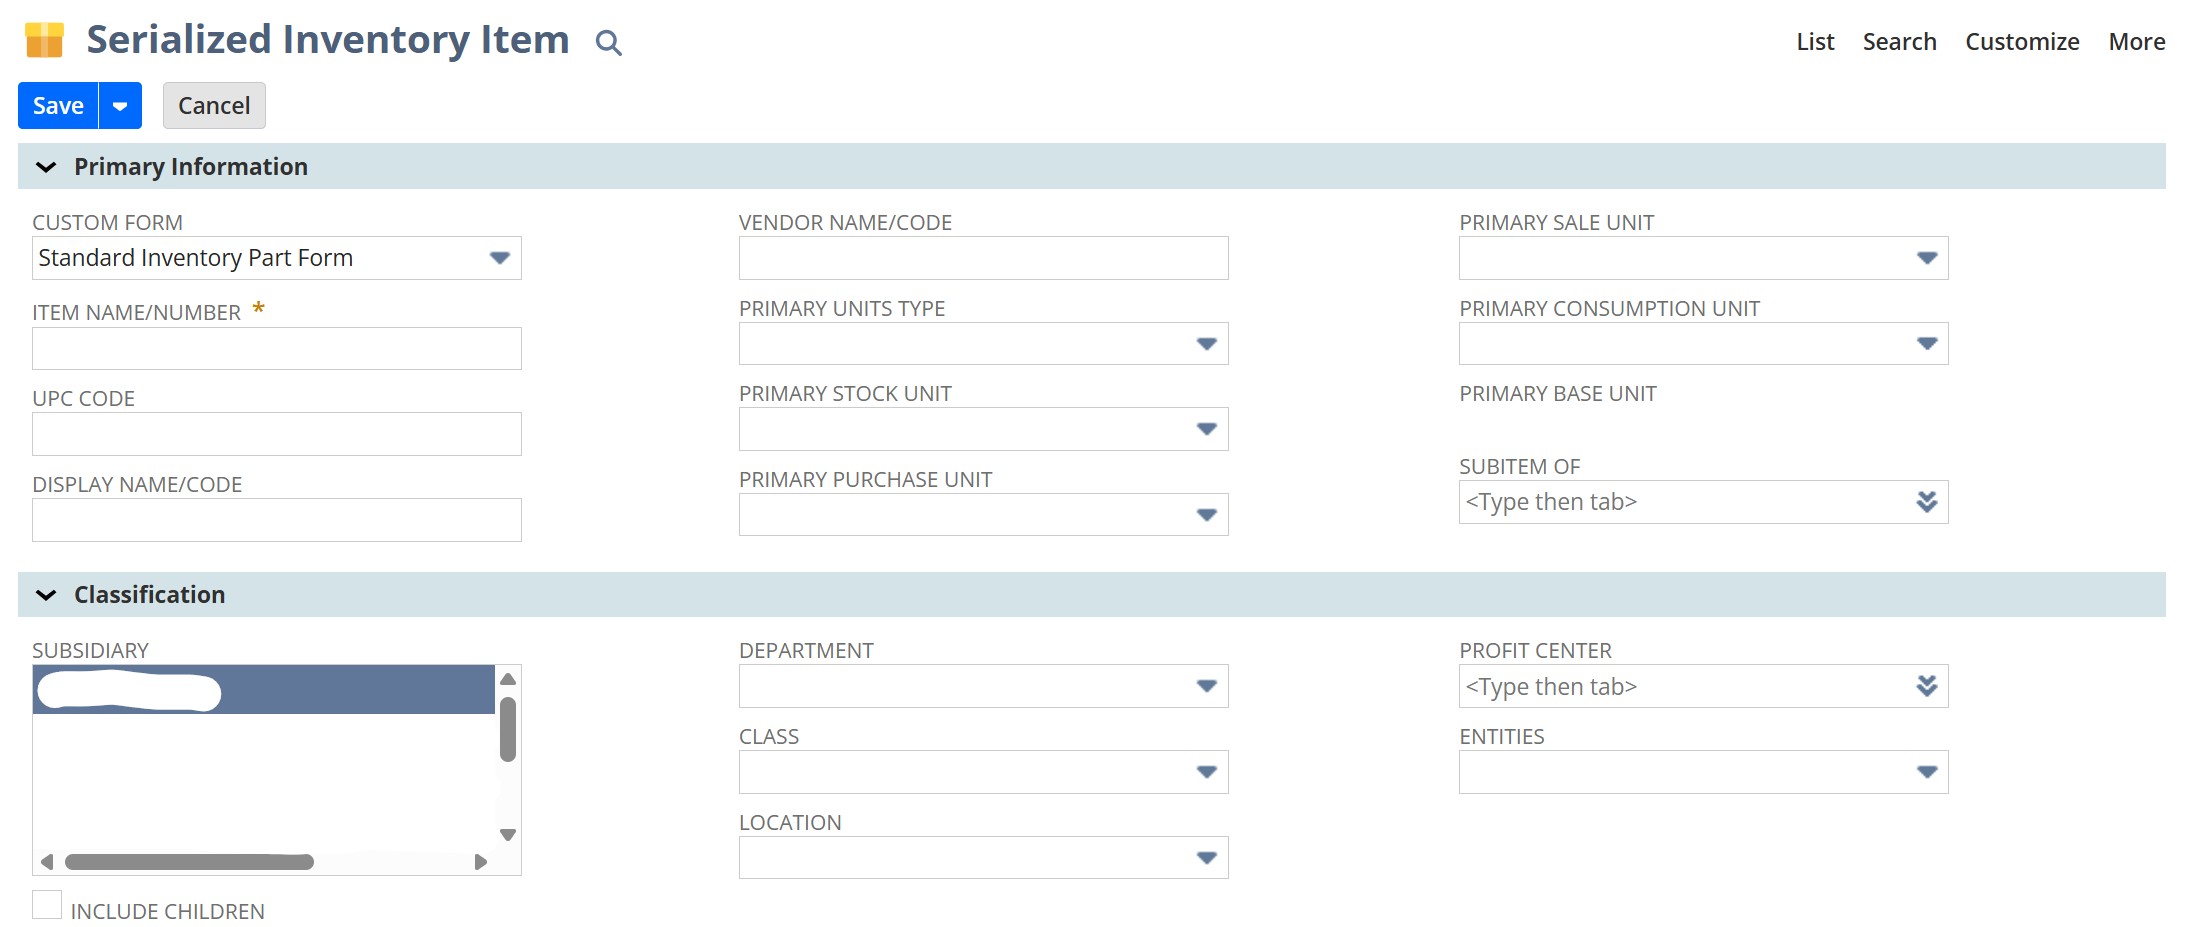
Set Up Primary Information on New NetSuite Serialized Item
Under the Purchasing/Inventory subtab, specify the locations where the item will be stocked. Under the Sales/Pricing subtab, add relevant sales, pricing, and shipping data for this item. Then, save the record. This item record now acts as a sort of “bucket” for this kind of serial item. When you create a purchase order for this item or receive this item into your inventory, you will be able to add the serial numbers associated with this order, up to the quantity listed on the PO or Item Receipt record. Let’s take a look at how to do that.

Using Serialized Inventory

Adding Serial Numbers on a Purchase Order
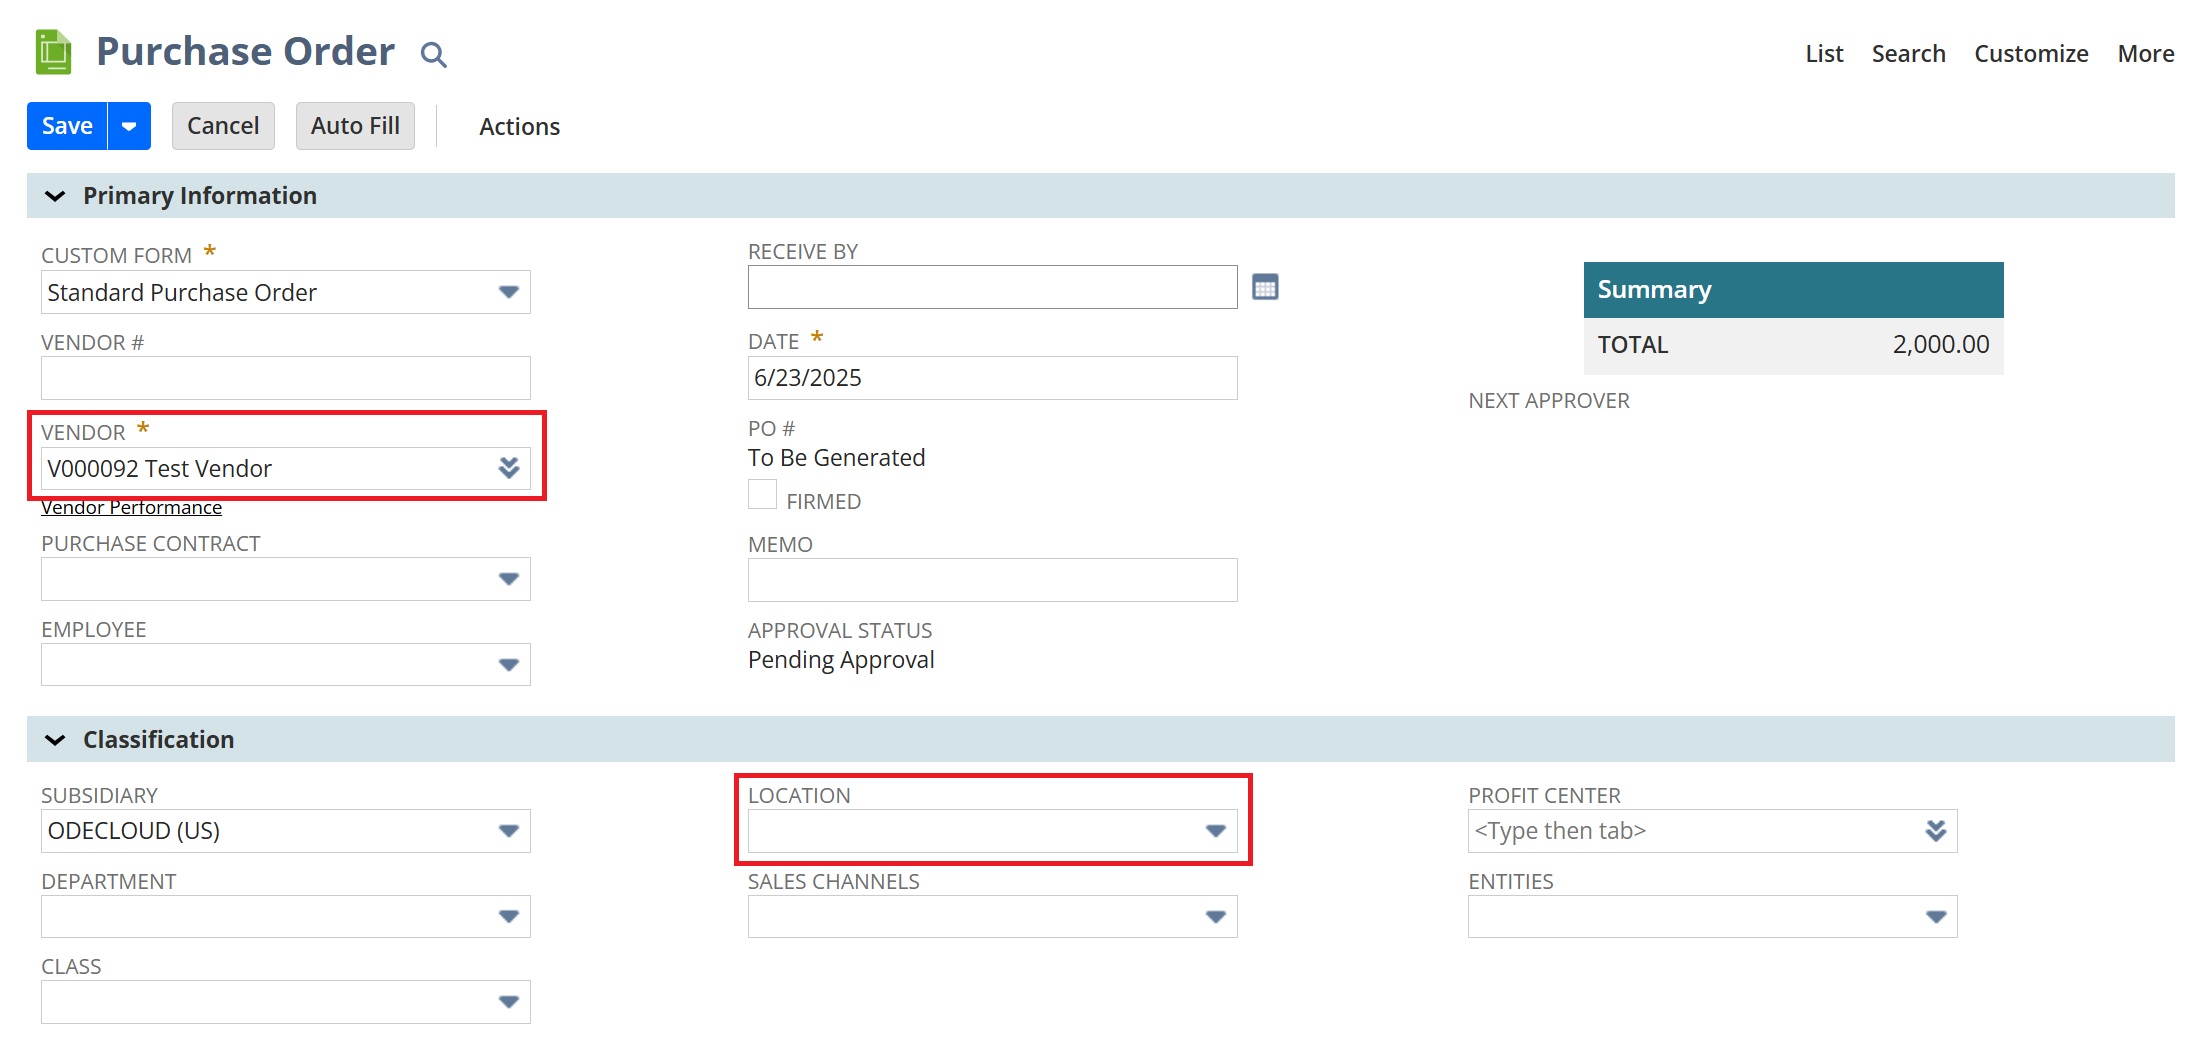
To add serial numbers to purchase order record, open a new PO (Transactions > Purchases > Enter Purchase Orders), and select the appropriate vendor and location for this PO. The vendor and location you select will affect which items are available under the Items dropdown.
Create New NetSuite Purchase Order

Then, scroll down to the Items tab and select the Items subtab. Here, you’ll add a serial item to the list and the necessary quantity. Then, select the icon in the Inventory Detail column.
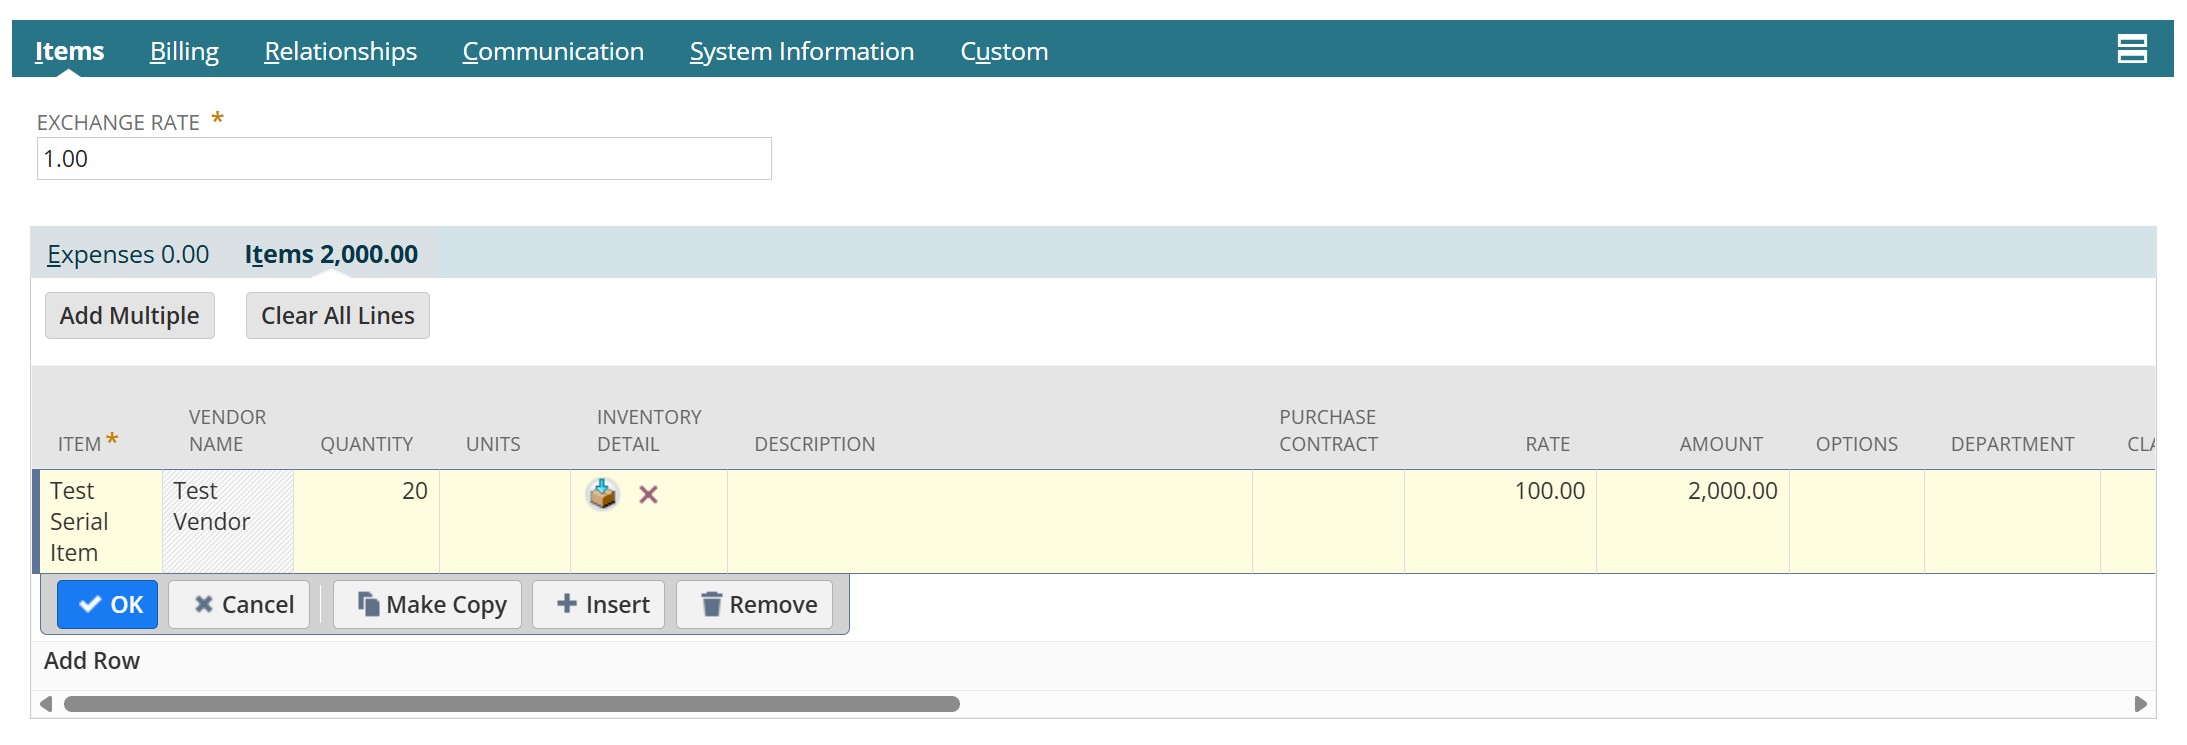
NetSuite Purchase Order Items Subtab

In the Inventory Detail pop up window, you have the option to add serial numbers to this orders. You can either have NetSuite auto-generate the serial numbers for this order or you can manually enter serial numbers. NetSuite will accept serial numbers up to the quantity listed on the Purchase Order. When you’re finished, hit “Ok” to return to the Purchase Order record and save the record.
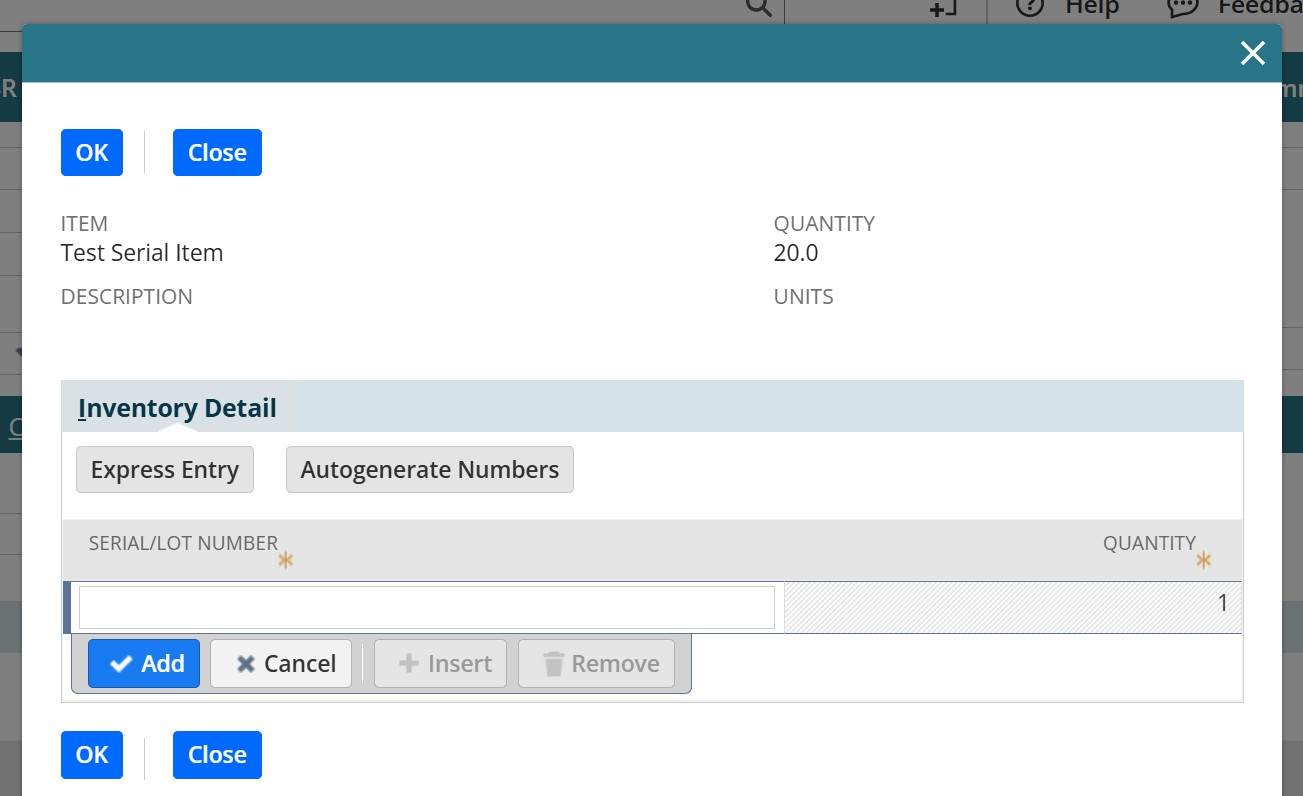
Serial Number Pop Up on NetSuite Purchase Order

Adding Serial Numbers on an Item Receipt
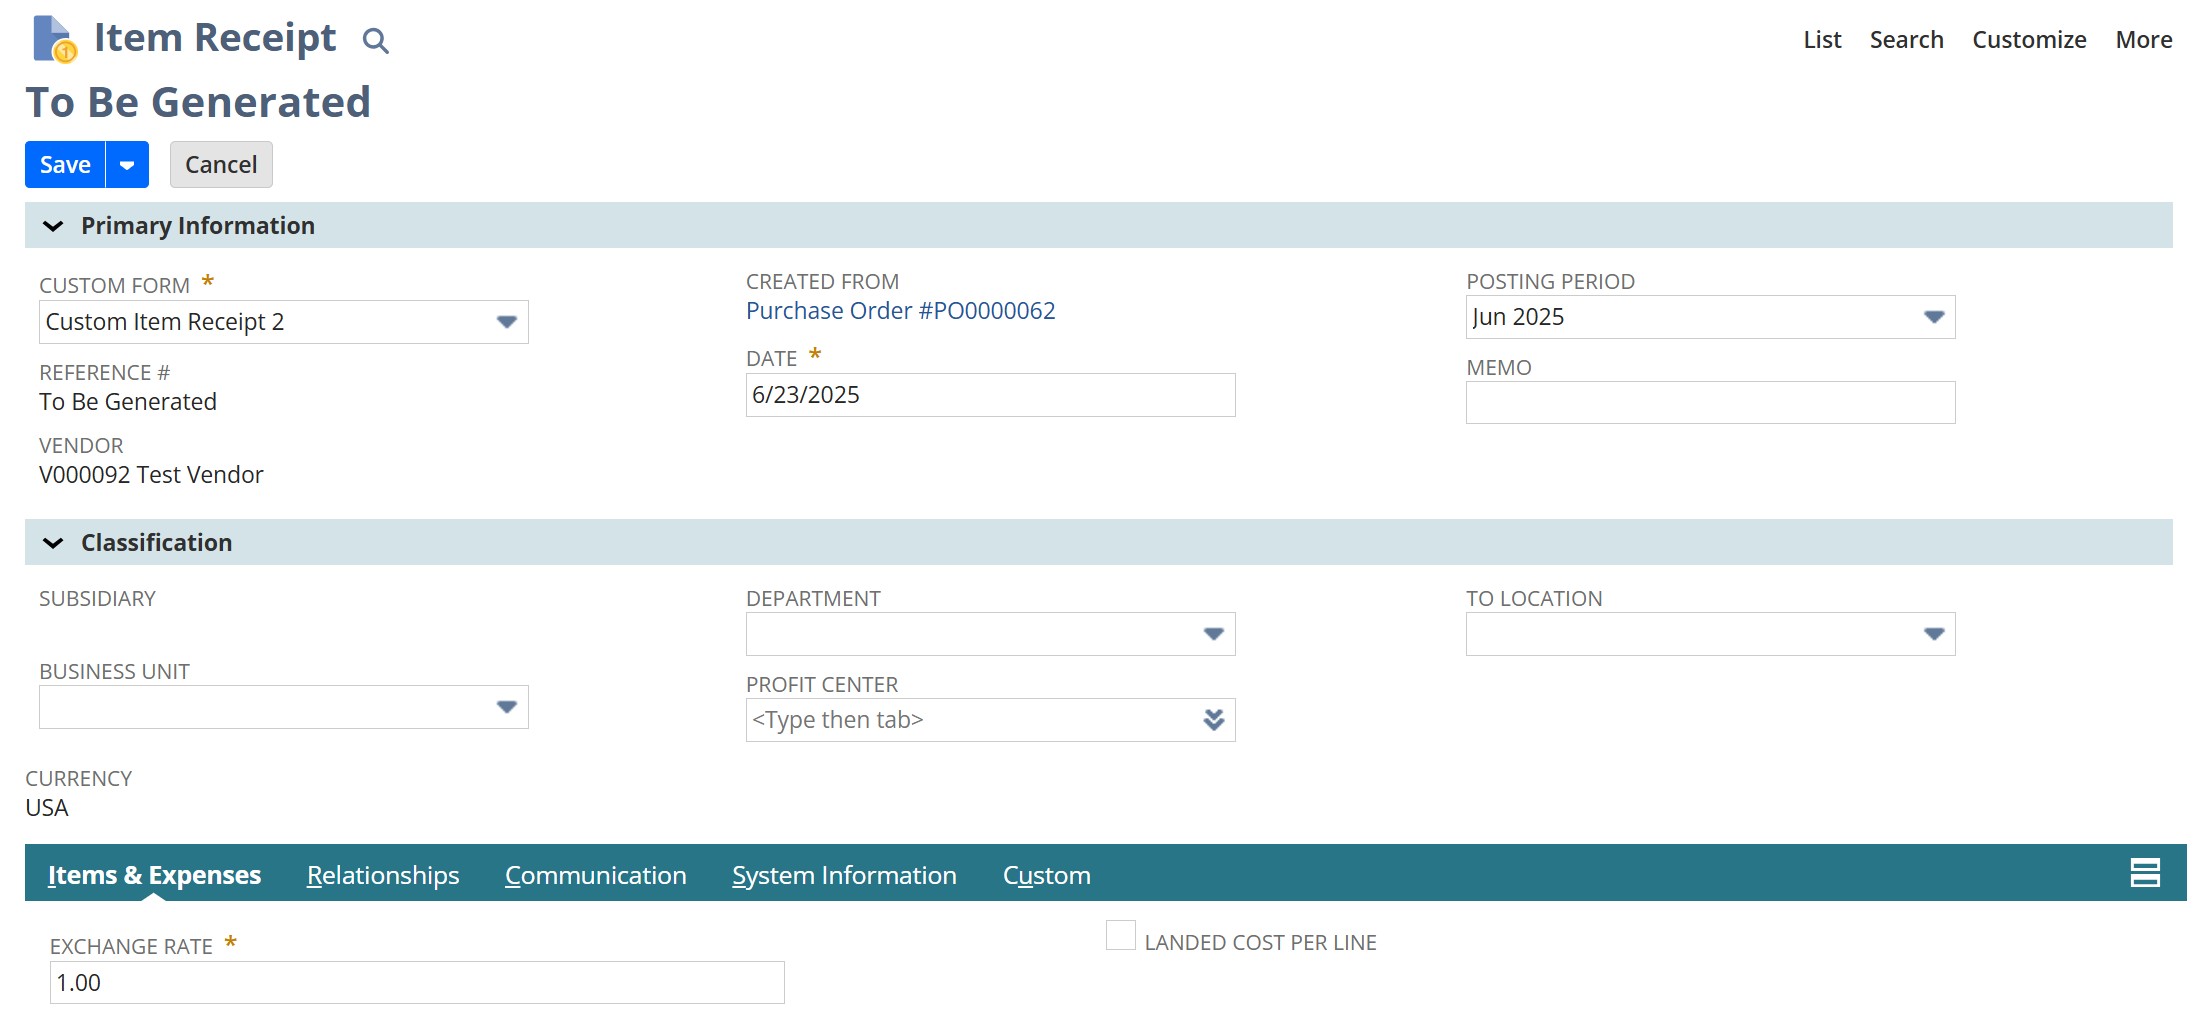
While you can add serial numbers to items on a purchase order, NetSuite users will more commonly add the serial numbers after they receive the shipment from their vendor. This is especially the case when the items you receive already have assigned serial numbers. In that case, you would add serial numbers to the item receipt record.
New NetSuite Item Receipt Record

On the item receipt record, navigate to the Items & Expenses tab. Under the Items subtab, scroll over to the Inventory Detail column and select the box icon.

Items tab on NetSuite Item Receipt Record
This will open a pop up where you may either add existing serial numbers from the items you’re receiving or autogenerate new numbers for this set of items. Select Ok when you’re finished and save the record.

Serialized Inventory vs. Lot Numbered Inventory

In a future blog, we’ll take a deeper dive into how you can set up and use the Lot Numbered Inventory feature in NetSuite. These two types of inventory are sometimes confused because of their similarities. How do you know whether a particular type of item needs to be a lot or serial-numbered item? Here’s a quick breakdown of their differences:
Serialized Inventory
  • Tracks individual units
  • Used for high-value items
  • Best for electronics, medical devices, and high-value tools
Lot Numbered Inventory
  • Tracks groups of items rather than individual units
  • Sometimes used for high-value items
  • Best for food, chemicals, and bulk materials
As a general rule, if you need to track each specific unit sold, then serialized inventory is the right choice.

Let’s Get You Set Up Right

NetSuite’s Serialized Inventory feature is powerful, but only if it’s configured in a way that fits your processes. At SuiteRep, we help businesses simplify and optimize NetSuite setup so you get the results you’re looking for. If you’re ready to start tracking your inventory down to the serial number, reach out!